new vaper stuff.

So my post about what to buy needs an update, because some of those things are out of stock or other things have popped up.

To get started vaping, you need:

  • a battery, preferably two, one for backup
  • a charger
  • a tank or topper to hold the liquid
  • a dripping atomizer for tasting liquids before filling the tank, these usually come with a mouthpiece called a driptip.
  • the liquid/juice

Yes, you DO need two batteries. The  dripping atomizer is the only thing on that list that isn’t an absolute necessity.
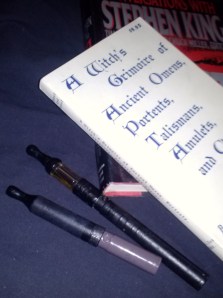
CAM02781Batteries: I think it’s easiest to start with ego-style batteries. They fit almost everything and they’re not too huge or crazy to look at. They’re a bit wider than a camel wide in the hand, and you can get tiny short ones too if you really are dead set on something very small.

I’d suggest getting a variable voltage one as your main battery, and a mini as your backup. This gives you one that’ll last a long time and which you can make more or less powerful, and also one tiny one for stealthy use. As always, I am writing for Poor people. I’m giong to try to give you a shopping list all from one place, that doesn’t cost too much and ships fast. Here’s the twist, and here’s the mini battery. If you poke around that site a bit you will notice that you can get these in any color, pretty much.

They also have chargers. If you have read about batteries exploding and stuff like that, it’s because people are using the wrong battery with the wrong charger. Or using batteries that are off-brand…it’s just like a cell phone battery, really, or a laptop battery. Those explode all the time too, when people put them on the wrong charger or something. So use the right charger, the right kind of battery (the ones I’m talking about) and don’t leave it sitting underneath a pile of laundry all night. Basically if you wouldn’t do it with your cell phone, don’t do it with these.

Now, the easiest tank I’ve used is this one. But if you choose citrus-flavored liquid or cinnamon, it’ll crack the plastic. So you can get this one if that’s what you plan to try. They cost a little more because they’re glass. I’d suggest getting one of each, so you have two complete set-ups to use. You’ll unscrew the base of these, disassembling it into two pieces, and then pour juice into the tank part. The base has a little head, a heating element, that can wear down over time- you simply replace that part eventually. (Those run about a buck) And both of these use the same part for that, this one.

Then, for tasting, here’s the cheapest atomizer.  You just take off the mouth piece, and put a few drops into the tube, then puff.

CAM02716[1]Now we’re done with the shopping list for that place. For juice, a cheap place to start is this store. They have tons of different flavors, and you can order tiny bottles for about 2.50. That way you can taste a variety of things, and figure out what kind of stuff you like. Tobacco flavors are all right, but you’ll want to try juices that have a LOT of flavor – and you will probably find that stuff that is less like tobacco and more like other stuff you enjoy eating, satisfies you more.

If you smoke more than a pack a day, try starting with 24mg content. If you smoke a bit less than that, try 18, or 12mg. A good thing to do, is to get a bottle at 24mg and also a bottle of the same flavor at 0mg- that way you can mix them together until the juice satisfies you without overdoing it.

The liquid contains nicotine- so if you spill it on yourself it can make you feel mighty sick. If you spill any, wash it off or clean it up as soon as you can. I’ve had one major spill, and it gave me the shits and the pukes really badly for an hour or so. So be aware of where you keep and how you use the liquids.

Side note, I didn’t get paid anything to write this, feel free to search around for the same stuff from other stores too! If you don’t mind a very long wait, fasttech.com has some of this stuff very cheap- but it can take a few weeks to get to you. There are tons of juice vendors too. The things I listed here are things I’ve bought myself, from the exact same place I linked to- they didn’t pay me or anything, and I don’t get anything out of sending you there.  If you find someplace cheaper or better, let me know! If you don’t want to even read this whole post or can’t be bothered clicking on stuff, you can get a serviceable kit here, although it only has one battery- it’s priced decently for what it is. Or this one, if it’s in stock. That one has two batteries, and tanks that won’t crack- so it’s an even better price.

You will probably end up finding better juices, bigger or crazier strong batteries, monster tanks and atomizers you can rebuild and stuff. But to start with you really need to start simple, easy, so you can understand how it works by putting your hands on it. After that things make a lot more sense. If you are a building/tinkering type of person, you can go ahead and build your own ecig pretty easily, all you’d need then would be a tank or atomizer. Plenty of people use cartomizers (like the “filter” thing on the blu and other disposable ones) which you can get in blank, to fill with your own liquids.

You can paint these, plastidip them. You can get a pipe stem and carve it to fit them. There’s a lot of weird shit you can do, the information is out there- usually the sites selling this stuff don’t give much information on it, but you can look here or here for more discussion and building ideas.

A lot of people buuy “mods”, too. “Mod” used to mean “modified”, like the person built it themselves- but now there are tons of people selling them in mass-produced versions. I don’t know much about those, mostly because I’m not only new to this, but also Poor, and those are really just Nice Things for Rich People that do the same damn thing the Poor version does.


(oh yeah…if this helped you, buy me a cup of coffee! unless you’re too Poor, in which case I understand completely.)

poly clay pipe bowl, process summary one.

I’ve been doodling schematics to build an e-pipe out of an old wooden pipe I have (which has its own long story, too) and decided that I needed a bowl to play around with- maybe two, or three. In reading up on traditional pipe woods, and researching blank pipe blocks and such, I came to the realization that I have a little pile of perfectly-beautiful rootstock driftwood with awesome grain…but I don’t want to start with something difficult. I want to test my schematics, and get some practice in with figuring out placements, sizes, and specs before I pour time into a piece.

CAM02683[1]

So I am using poly clay to map out my ideas. Since there will be no fire, no burning, and the bowl of the pipe will not be in anyone’s mouth- it’s perfectly safe to use as a pipe for vaping (PV style- I don’t smoke pot so I have no clue about the temperatures for that, or if poly clay would work, so you’re on your own, potheads.)

I’m using liquid acrylics to make the ivory clay different tones. This first time I’m more concerned with getting the size right and the shape and stuff, or as close to ok as possible, than with prettiness, so I am just using a couple browns I like and aiming for a kind of general pale woodgrain thing.

Here you can see, poly clay, warmed up and kneaded, and two colors of liquid acrylic ink. On top of my schematic sketches.

After getting my clay warm and ready, I broke it up into a few balls. Then I added some color to one-

CAM02685[1]Just enough to tone it brown, warm. And then kneaded it in (I do not have any tools for working clay, I do it by hand and then work over the baked pieces with a dremel) You have to knead it in until there are no bubbles, and no more “pockets” of ink or paint in it. It shouldn’t really be homogenously colored, for what I’m doing, so I just worked it in until it was pretty well the same consistency throughout.

I’m using Waverly acrylics here- Bill makes amazing tattoo inks for professionals, and also has this sideline of making incredible paints.

His brown is incredibly intense on paper. Here, it ends up very diluted.

My hands get really gross from this paint.

You have to get poopy hands to do this stuff properly. If you wear gloves, you’re cheating and your stuff will come out ugly. I swear it.

CAM02686[1]I did the same for a nice antelope brown, it’s a sort of olive green/yellowish amber color that is hard to pin down.

It’s another one of my favorites for painting, FW makes very fluid inks and paints.

I used a bit more of this color and more clay in this color, I really like it.

To be noted: I now have moldy, poopy hands.

If you want more color saturation, you can use tube acrylics, or even oil paints or pigments. Just make sure that the clay stays elastic, bendy. If it starts to fall apart, you’re watering it down too much with paint. You want the clay to be able to set up strong and hard, not crumbly or brittle.

I ended up adding about three rounds of ink. I just squeeze some out onto the blob, knead it in and spread it around the surface. I try not to trap any liquid or any air inside the blob either, bubbles will bake to the surface later and wreck the finish.

At this point the clay is really warm and goopy.

I did a third ball of amber tone brown, I won’t show that one as it is pretty boring to see pictures of a poopy, exorcist-pukey, moldy hand.

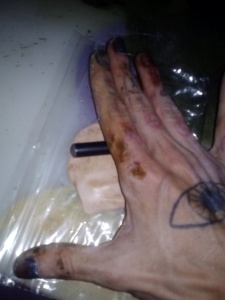
yes, that's an old 510 battery as a mini rolling pin.

yes, that’s an old 510 battery as a mini rolling pin.

Now you roll out all three balls into flat pieces. I make them about an eighth of an inch thick at this point. I don’t want the colors to get muddied or blend together too much.

I’m also being lazy.

Roll out all three, then make a sandwich of them. I put the greenish brown in the middle and the creamy amber on top. It doesn’t matter much though, because once you stack them? pat them til they meld together a little, then roll THAT out into a thinner piece.

I did this once. again- lazy.

.

.

.

CAM02693[1]CAM02694[1]Take a break for some iced tea.

Now, I took a baggie. I put some black ink on top of my sandwich of clay, then folded it in half and put it in the bag. Then I rolled it out again. Then I folded it over.

Then I rolled it out again. I kind of did this a few times at random angles, trying to get the black to make layers.

I did this only until I felt like the pattern was sort of woodsy (that word. I love anything woodsy)

By this point everything is covered in poopy mold and pea soup. It’s awesome. Sometimes a mess is what you need. I had kind of a rough day, I couldn’t sleep last night, I’m waiting on someone I did a commission for to let me know they got my email, and I am broker than usual…which is always depressing.

So this messy clay is therapeutic.

CAM02695[1]

CAM02697[1]Now I took whatever was handy (a pen) and mushed the clay layers around into each other, poking dents into the clay, making little hashmarks and stuff. I find that if you do this in an organic pattern- not perfect or symmetrical, but simply balanced in randomness with some repeating elementsthen it looks more like wood.

I’ve made wood-grain clay before, and it came out better than this will, because I was more concerned with the graininess that time.

Then I get out my one-dollar cure-all shank knife, and slice the ragged edges off.

I used the little bits left over to plug up the depressions and dents.

This kind of makes “knots” if you do it right. I didn’t do it quite right.

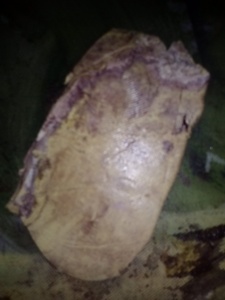
Then roll it out one last time, and check it- it looks like MEATWOOD!

seriously. meat, wood.

seriously. meat, wood.

CAM02700[1]CAM02702[1]Now I can start to shape the bowl. Finally. I made the rolled out clay a little too thin this time. I think I should have made it maybe twice as thick as I wanted the bowl to end up, the walls of the bowl. But I made it only a little thicker, so I ended up making the bowl thinner-walled than I’d wanted. I kept lining it up with my to-scale sketch, to make sure I wasn’t making anything the wrong size for the hardware I’ll be putting in later.

I even tucked the tank wize I will be using on it, into the stem to check. I did however forget to account for shrinkage- polyclay shrinks a bit when you bake it.

But there’s a simple fix for that- I can just kind of ream out the stem (shank?) when I get to the dremel stages, and make a little more room- or use a little bit of epoxy in there to hold something tightly in the shank.

.

CAM02703[1]

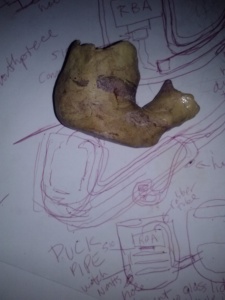
I got pretty close to the right size and shape.

,

double checking stuff against my very precise planning sketch.

double checking stuff against my very precise planning sketch.

oh man, that bowl is crooked. I'll mess with it some more.

oh man, that bowl is crooked. I’ll mess with it some more.

Now that I’ve got things sort of situated, I get a sheet of aluminum foil out, big enough to make a tent all around the pipe. It shouldn’t touch the clay at all, or it’ll singe it. I packed all the holes with coffee filters torn and mushed to the right supporting shape, and put a folded bit of filter under the base of the pipe, between the pipe and the foil.

Then I stuck it in the oven at 275 and waited about forty five minutes.
Then I yanked it out fast and dunked it into very cold water for about five minutes.
Then I wiped it off and took more photos.
The next step after this is the dremel, rasps, files, and sanding. I will probably buff a mild shine on the surface but I don’t like the glassy look too much so I may tone that down. Or even engrave with the dremel a nice testure to match the “grain” of the wood. I think it came out pretty well for a first attempt at this, and tomorrow I’ll post either the second attempt, or the pictures of this being worked over and finished out.
I’ll probably have to add a third post to show the wiring and stuff I’m planning; but I will cross that bridge when I come to it. For now, I have a nice unfinished “wood” clay pipe to work with.

Sorry for the dark photos, I will get awesome bright daytime ones tomorrow, I promise.
CAM02706[1]CAM02707[1]CAM02708[1]CAM02709[1]

juice reviews three! rocketfuel, vaporchef, gremlin, and diy.

I got a pile of samples from rocketfuel last week, and left them to steep while I was gone camping out. I also have a handful of other flavors to taste tonight! YAY excitement! I’m using a plain ole 510 dripping atty on an ego twist at whatever setting tastes best. All juices are as close to 100% VG as I was able to get. They’re all at either 18 or 12mg nic content, too.

HORRIFYING UPDATE. I have now also spilled ALL of the ol’ river all over myself. That’s two bottles spilled, one of them my favorite of the bunch. GAWDAMMIT SHITWHORE.

(more…)

more flavor thoughts, and summertime grilling.

kozmo's summertime

kozmo’s summertime

I’ve tried another batch of flavors, and have some thoughts on them. (for those of you looking for the starter kits/basic vaporizer setups, this place has the nicest cheap ones right now. I’ll post a different place if I find a better one.)

Newly added to the all-day vape category:

Honey fig tobacco from the Plume Room. This is luxurious, slightly sweet on the exhale, and rich. Along with Honey nut and Sweet cream, it’s in my pocket now when I leave the house.

Bread from Ecblend. It’s dry. It’s got the same nice crisp dryness as the Graham cracker flavor I like so much, but it also has…sourdough? Some sort of definite savory undertone. It’s very, very good- if you’re looking for something that’s unsweet, this will work.

Vanilla custard from Gremlin Juice. This is the best custard I’ve ever had. And it’s got the right vanilla in it- it’s not flowery at all or artificial-tasting. It’s a good, heavy dessert flavor.

(more…)

Vapor, nicotine juices, flavor thoughts, and summertime is coming.

I'm the brownish one.

I’m the brownish one.

I have tried a ton of flavors now. I use a regular 510 atomizer for dripping when I taste new flavors.

I originally posted this list to another site via my profile there. figured some of you might like to see it.

Where I haven’t indicated otherwise, these are all 0 extra flavor shots, highest available VG content, and 24 mg nicotine content.

Things I have liked a TON:

  • MBV: sweet cream, high VG, 2 extra shots. I liked this right away, it’s a very simple flavor, and when steeped becomes solid but still simple. this is my in-between flavor, an all-day vape if I am not in the mood for anything complex.
  • Archvapor “special”: My first setup was a gift from a redditor ( /u/DangerousFat [+1][1] , thanks!!! again) and it came with a small bottle of this. It’s been on constant rotation ever since, for me. It replaced that strong tobacco craving I had at the start. I bought a huge bottle of it that I let steep and have used ever since.
  • ECblend carrot: Sounds odd, but it is sweet and crisp. After steeping a bit, it’s just like a glass of carrot juice. I mix this with home-made ginger VG extract, for extra oomph, but it’s good on its own. I like it on hot days.
  • Panda RY4: I am not a big fan of the other panda flavors I’ve tried, but this is just simple, sweet, and has enough bite to be good. I ran out fast.
  • The Vaporchef’s honey nut tobacco: this is another ADV. It is nutty, and jjjuuuust sweet enough. It’s better after a few days of waiting but I always start in on it right away. This is another one I got a big bottle of.
  • MBV graham cracker: Dry, and good. It is for when I am eating something sweet/drinking something sweet and don’t want a sugar overload. It’s very good as a vape with coffee, too. It’s got a really definite graham flavor. I got it with an extra flavor shot.
  • Vixen vapors: honeysuckle. Oh lawdy. I will need more of this. It’s not even steeped! No perfumey flavor, just straight sugary flower taste.

(more…)

something else I made today- and a quick up for PV using instead of smoking.

I haven’t smoked in two days, and I’ve smoked a single pack of cigarettes in the past week. I finally got good gear for PV/ecig use, so I haven’t felt the urge to smoke.

I can also see this becoming an all-consuming side hobby for me. I made these little desk-props for my pvs today out of polyclay. I plan to paint them (one’s a dick, one’s tits, and one is an eye)…maybe I’ll make a few more too, that are a little more interesting or fleshed-out.

PV e-cig desk prop or holders

This is a unique website which will require a more modern browser to work!

Please upgrade today!