poly clay pipe bowl, process summary one.

I’ve been doodling schematics to build an e-pipe out of an old wooden pipe I have (which has its own long story, too) and decided that I needed a bowl to play around with- maybe two, or three. In reading up on traditional pipe woods, and researching blank pipe blocks and such, I came to the realization that I have a little pile of perfectly-beautiful rootstock driftwood with awesome grain…but I don’t want to start with something difficult. I want to test my schematics, and get some practice in with figuring out placements, sizes, and specs before I pour time into a piece.

CAM02683[1]

So I am using poly clay to map out my ideas. Since there will be no fire, no burning, and the bowl of the pipe will not be in anyone’s mouth- it’s perfectly safe to use as a pipe for vaping (PV style- I don’t smoke pot so I have no clue about the temperatures for that, or if poly clay would work, so you’re on your own, potheads.)

I’m using liquid acrylics to make the ivory clay different tones. This first time I’m more concerned with getting the size right and the shape and stuff, or as close to ok as possible, than with prettiness, so I am just using a couple browns I like and aiming for a kind of general pale woodgrain thing.

Here you can see, poly clay, warmed up and kneaded, and two colors of liquid acrylic ink. On top of my schematic sketches.

After getting my clay warm and ready, I broke it up into a few balls. Then I added some color to one-

CAM02685[1]Just enough to tone it brown, warm. And then kneaded it in (I do not have any tools for working clay, I do it by hand and then work over the baked pieces with a dremel) You have to knead it in until there are no bubbles, and no more “pockets” of ink or paint in it. It shouldn’t really be homogenously colored, for what I’m doing, so I just worked it in until it was pretty well the same consistency throughout.

I’m using Waverly acrylics here- Bill makes amazing tattoo inks for professionals, and also has this sideline of making incredible paints.

His brown is incredibly intense on paper. Here, it ends up very diluted.

My hands get really gross from this paint.

You have to get poopy hands to do this stuff properly. If you wear gloves, you’re cheating and your stuff will come out ugly. I swear it.

CAM02686[1]I did the same for a nice antelope brown, it’s a sort of olive green/yellowish amber color that is hard to pin down.

It’s another one of my favorites for painting, FW makes very fluid inks and paints.

I used a bit more of this color and more clay in this color, I really like it.

To be noted: I now have moldy, poopy hands.

If you want more color saturation, you can use tube acrylics, or even oil paints or pigments. Just make sure that the clay stays elastic, bendy. If it starts to fall apart, you’re watering it down too much with paint. You want the clay to be able to set up strong and hard, not crumbly or brittle.

I ended up adding about three rounds of ink. I just squeeze some out onto the blob, knead it in and spread it around the surface. I try not to trap any liquid or any air inside the blob either, bubbles will bake to the surface later and wreck the finish.

At this point the clay is really warm and goopy.

I did a third ball of amber tone brown, I won’t show that one as it is pretty boring to see pictures of a poopy, exorcist-pukey, moldy hand.
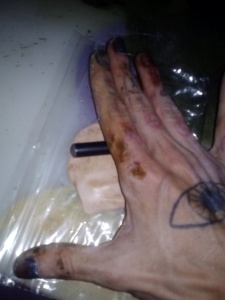
yes, that's an old 510 battery as a mini rolling pin.

yes, that’s an old 510 battery as a mini rolling pin.

Now you roll out all three balls into flat pieces. I make them about an eighth of an inch thick at this point. I don’t want the colors to get muddied or blend together too much.

I’m also being lazy.

Roll out all three, then make a sandwich of them. I put the greenish brown in the middle and the creamy amber on top. It doesn’t matter much though, because once you stack them? pat them til they meld together a little, then roll THAT out into a thinner piece.

I did this once. again- lazy.

.

.

.

CAM02693[1]CAM02694[1]Take a break for some iced tea.

Now, I took a baggie. I put some black ink on top of my sandwich of clay, then folded it in half and put it in the bag. Then I rolled it out again. Then I folded it over.

Then I rolled it out again. I kind of did this a few times at random angles, trying to get the black to make layers.

I did this only until I felt like the pattern was sort of woodsy (that word. I love anything woodsy)

By this point everything is covered in poopy mold and pea soup. It’s awesome. Sometimes a mess is what you need. I had kind of a rough day, I couldn’t sleep last night, I’m waiting on someone I did a commission for to let me know they got my email, and I am broker than usual…which is always depressing.

So this messy clay is therapeutic.

CAM02695[1]

CAM02697[1]Now I took whatever was handy (a pen) and mushed the clay layers around into each other, poking dents into the clay, making little hashmarks and stuff. I find that if you do this in an organic pattern- not perfect or symmetrical, but simply balanced in randomness with some repeating elementsthen it looks more like wood.

I’ve made wood-grain clay before, and it came out better than this will, because I was more concerned with the graininess that time.

Then I get out my one-dollar cure-all shank knife, and slice the ragged edges off.

I used the little bits left over to plug up the depressions and dents.

This kind of makes “knots” if you do it right. I didn’t do it quite right.

Then roll it out one last time, and check it- it looks like MEATWOOD!
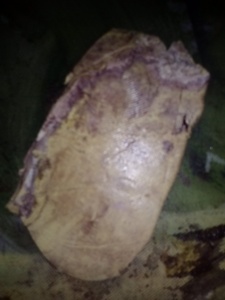
seriously. meat, wood.

seriously. meat, wood.

CAM02700[1]CAM02702[1]Now I can start to shape the bowl. Finally. I made the rolled out clay a little too thin this time. I think I should have made it maybe twice as thick as I wanted the bowl to end up, the walls of the bowl. But I made it only a little thicker, so I ended up making the bowl thinner-walled than I’d wanted. I kept lining it up with my to-scale sketch, to make sure I wasn’t making anything the wrong size for the hardware I’ll be putting in later.

I even tucked the tank wize I will be using on it, into the stem to check. I did however forget to account for shrinkage- polyclay shrinks a bit when you bake it.

But there’s a simple fix for that- I can just kind of ream out the stem (shank?) when I get to the dremel stages, and make a little more room- or use a little bit of epoxy in there to hold something tightly in the shank.

.

CAM02703[1]

I got pretty close to the right size and shape.
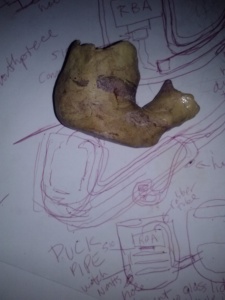
,

double checking stuff against my very precise planning sketch.
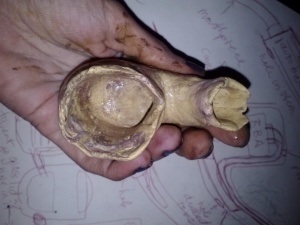
double checking stuff against my very precise planning sketch.

oh man, that bowl is crooked. I'll mess with it some more.

oh man, that bowl is crooked. I’ll mess with it some more.

Now that I’ve got things sort of situated, I get a sheet of aluminum foil out, big enough to make a tent all around the pipe. It shouldn’t touch the clay at all, or it’ll singe it. I packed all the holes with coffee filters torn and mushed to the right supporting shape, and put a folded bit of filter under the base of the pipe, between the pipe and the foil.

Then I stuck it in the oven at 275 and waited about forty five minutes.
Then I yanked it out fast and dunked it into very cold water for about five minutes.
Then I wiped it off and took more photos.
The next step after this is the dremel, rasps, files, and sanding. I will probably buff a mild shine on the surface but I don’t like the glassy look too much so I may tone that down. Or even engrave with the dremel a nice testure to match the “grain” of the wood. I think it came out pretty well for a first attempt at this, and tomorrow I’ll post either the second attempt, or the pictures of this being worked over and finished out.
I’ll probably have to add a third post to show the wiring and stuff I’m planning; but I will cross that bridge when I come to it. For now, I have a nice unfinished “wood” clay pipe to work with.

Sorry for the dark photos, I will get awesome bright daytime ones tomorrow, I promise.
CAM02706[1]CAM02707[1]CAM02708[1]CAM02709[1]

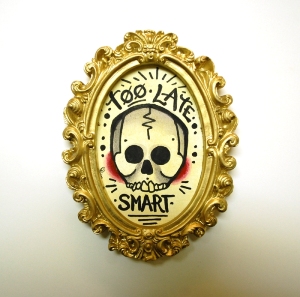
rats win races, sloths succeed.

556740_10151360701822712_101340810_n559917_10151362094257712_740607251_nDSC_1159a reminder tattoo for a tattoo artist friend of mine. he wanted to remember to slow down, and do more focused work, instead of hurrying up and rushing himself. He is the kind of artist who feels a lot of pressure from his clients, he tends to feel so glad to be tattooing that he forgets that his work is valuable, that his BEST work is worthwhile…that people who want really good tattoos are willing to pay for them, and that he is capable of doing great tattoos, and therefore shouldn’t undervalue his time…

If you undercharge people, you start to feel rushed. it’s inevitable- you end up booked solid for months but barely making ends meet. hurrying up to get that tattoo done in time, in the small amount of time you quoted them for. it’s far better to quote high, to take your time, take that extra hour to do your VERY BEST work on people.

any rate- I love fucking sloths. And this one is particularly classy, too.

also,


298323_10151361506522712_1862424666_n

I spent a day at Neptune, south of Yachats on the coast.

DSC_1151 DSC_1146 DSC_1145 DSC_1132

You poor kids.

my blog: like a hundred baboons writing shakespeare with assault rifles

My standard advice to anyone wanting to learn to tattoo is “MOVE OUT OF OREGON AND GET A REAL APPRENTICESHIP”. I find the idea of “schools” laughable and repugnant.

You simply cannot teach “class” of more than one person hands-on, tattooing is not like other fields in this sense. Apprenticeships served one-on-one, by the person who plans to hire you afterward, are and were the tattoo industry standard.

Being here is the first time I have ever heard of a tattoo “school” being taken seriously by ANYONE as anything but a scam that teaches the student nothing.
Churning out people without being responsible for their future career is a terrible idea; I’d never before heard of ANYONE being taught without being hired by the teacher once they’d learned.

An artist who is very skilled and dedicated does not have time or interest in teaching twenty people. They may take the time to properly apprentice one or two during their career. In order for an artist like this to have an apprentice in Oregon, they must open a school in a manner that assumes they will want to teach multiple people; they must charge money, they must do a lot of things which deters them from bothering at all. The system in Oregon is set up so that the very best tattoo artists won’t teach, and those with less skill, will.

SHE DOESN’T EVEN HAVE ANY TATTOOS


People who are proficient at filling out forms and such; not good tattooers. We end up with under-educated people with no place to work, turned loose to fend for themselves.

I feel like a lot of these younger artists were completely ripped off by the system, taken advantage of, their ambitions falsely turned against them. We could have so many highly-trained young artists here, instead we have a pile of people who COULD be great, but are flailing around trying to learn on their own. It’s a waste of time, and it’s bad for tattooing.

Again- you can NOT teach tattooing in a class. This requires apprenticeship and mentoring beyond that; should be done in the interest of furthering our art, not raking in cash from naive starry-eyed kids and then tossing them out in the street to beg for work (or worse, open their own shop because they can’t find a job…how are they going to learn more then? When they are working alone with only their limited knowledge to go on?)

A few people have done the best they can teaching under these rules, but a first-year OR tattoo artist is still, STILL, light-years behind almost any other first-year tattooer.

In tattooing, it’s not good form to talk down on whoever taught you, no matter how fucked-up things ended, or how poorly the teaching as done. I feel that the current rules in oregon were passed without any insight into the general standards of tattooing nationwide and have really made us look bad in comparison to other places. The school/apprentice thing being the biggest issue.

Y HALO THAR TINY JACKASS

It’s not so much the number of new artists, because demand is still high and rising. it’s the quality and skill of those artists! YOU SHOULD NOT TEACH SOMEONE YOU DON’T PLAN TO HIRE. simply put!

The input given by a mentor during the first few years of tattooing is just as important as the original apprenticeship, and a formal apprenticeship gives in-depth, hands-on information that can’t be given in a class setting, or by someone who is teaching a herd.

For you guys who are wanting to learn tattooing: MOVE OUT OF OREGON. If you have other things in your life preventing that, be aware that YOU WILL NOT HAVE TIME FOR THOSE THINGS ANYWAY. The time during your apprenticeship, tattooing needs to be the first and only priority in your life.

So, move! Find someone who wants to INVEST in you, share their knowledge, and guide you. Don’t slap down cash on the barrelhead and expect to be a respected artist because you bought in.

I’m crossposting this rant from a forum where I posted it all; I have snipped out a few bits that were more technical, but the gist is the same. Learn from someone who wants to hire you, teach only someone you plan to hire.

is your art good enough to sell online?

Short answer? Yes.

Long, realistic answer?

pretty on the inside

I show you my heart.

Putting your art up online is kind of like showing it in a gallery. You may not be the best at your particular art style, but if you want to improve, showing the internet what you are doing is a good way to get better. There are so many skill levels, so many ways of expressing yourself; the internet is home to them all.

If you’re really timid, start slow. Use deviantart, and request critiques. Once you feel like you can handle more harsh views, try some art forums, and ask for opinions.

Or, alternately, you can dive right in. We all start where we are. Try to get very good pictures of your work. never upload giant files; upload files that are just big enough to look good on a monitor, no larger. Image theft is common, and sometimes unintentional. If you watermark unobtrusively, and only upload smaller files, you’ll find more people credit you when reposting or sharing your work. You want people to do that, because that is how you will sell your art online.

Etsy is a good starter for artists. It’s not the best venue for fine art, but it can be a good way to get your feet wet. Be cautious, though, as most of the advice on using etsy is not written with art in mind, but easily-reproducible craft. Your painting can’t be tagged and posted the same way a t-shirt can. This is why etsy is only a starter site.

The Craftstar has a decent art section, but you will have to have a paypal and pay for listing in advance.

You could also opt for one of the other sites geared for art sales- originals are harder to sell most places than prints, but it IS possible to sell just originals online.

If you are just starting out, keep your prices as low as possible. Once you are selling your work on a regular basis, then you can raise your prices. At first, it’s unknown if you will succeed or not. Most people not only buy art for its look, for how it grabs the eye, but also for the artist’s longevity, their name, their history. Build your history a little!

It’s the internet. You should maintain privacy for your own comfort and safety of course-but letting people get to know you, talking about deep or personal things, lets the viewer understand the origin of your works, and become more invested in them. Give them a chance to find out where the art came from. You can be a cantankerous bitch hermit like me and STILL be capable of showing your inner self online. You don’t have to be outgoing to do it; you can talk as if the site was your own art journal, your own notes about each piece.

So- yeah. Your art is good enough to sell online- at etsy or anywhere else. Keep your expectations of sales low at first, and your prices the same, and then as time passes you will see how your work can fit into the greater whole of online art.

And if you need encouragement, ask for it. And if you need a slap on the wrist, or a sound drubbing, you should ask for that too. All the help you could ever want from other artists lives inside your computer, but it can only do you good if you put your own work in there too.

excerpt from “through the looking glass”, an article by Mary Cecil about her experience with psychosis and commitment

Mary Cecil voluntarily committed herself to an institution in the early 1950s. This account was published in its entirety in Encounter, in 1956. Again, the article is excerpted from the book “The Inner World of Mental Illness”.

(for other excerpts, see here, or here)

After a fortnight in a sort of reception ward in the mental hospital, I complained to the doctor that nothing was being done. They didn’t appear to appreciate the urgency of the position. There was I, helpless in the hands of a fiend from Hell and anything might happen any minute. (Ms. Cecil believes that a hallucinated voice is the Devil, sent to harass her.) The Hospital ambled through its days, sweeping us off to Occupational Therapy or out to grass, as the mood took it. One might be suddenly singled out and, eager with hope, be subjected to a blood test or some flippancy like that.

“Ah, but we’re doing so much for you,” the doctor said earnestly…”In fact,” the doctor continued fatly, “we’re going to give you some injections. You’ll be moved to another ward.”

I’d learned already that it was a waste of time asking questions. Psychiatrists thrive on their air of mystery. Anyway, the fact of strange surroundings was enough. In this ward there had been some outbursts from explosive patients. …I noticed that the more obstreperous patients were dragged off, protesting violently, to some outer dungeon spoken of in whispers as the Villa. I added that to my fears and redoubled my attempts to appear totally harmless.

She discusses insulin treatment she received after being transferred to the next ward- a treatment used commonly at that time.

After tea I saw a lady doctor who said I was to have some injections. I saw myself ablaze with vitamins in next to no time. At bedtime the men disappeared into one dormitory and we women into another, so that was all right. Just as I was getting into bed I noticed a sheet marked the Villa. There was a curious taste in my mouth, had I been tricked into the place? Heart thudding, I gazed out the window and saw a small building by itself. “That’s the Villa,” breathed the woman in the next bed.

(more…)

watermarking images.

spider skeleton mount taxidermy artI’ve seen my work posted and reposted a lot online (it probably started in earnest, with my work, when this image was the main image on the wikipedia “tattoo” entry for almost a year) and I’ve never really thought about the amount of people who may be seeing it with no idea who made it.

A few things recently made me consider starting to watermark my stuff with this site’s address. First, I was looking at sketches done by some artists on a social network site I use, and found a sketch of my spider monkey mount’s skull and jaws. It was a great sketch, and I commented on it saying I loved that someone was using my work as inspiration. The artist blew it off, saying “Yes, I found this randomly online.” They had no idea they were talking to the creator of the work they were (tracing) drawing.
I explained that it was my work, she was excited to find out where it came from, we made friends.
It was a really good sketch.

Then, I found my spider skeletons posted to a russian site- and have no idea what on earth it says, whether it links back to me (update- it does) or not, and would love to comment but have no idea which buttons are for commenting or anything since I don’t read cyrilic.

Should I start watermarking things? I’d love it if every time my work was reposted or re-used, someone new came to see the rest of what I do, came here and maybe even said hi or spoke with me.
Having the site address on each photo is something I have alternately been too obstinate, or too lazy, to do. I don’t think even if I did this, that I would have the patience to go back and watermark all my older images (about twenty thousand images of my various works exist online) but maybe, going forward, I should make the effort.

What do you think?

home tattooing, round 13,879

http://resonanteye.net/2012/01/06/on-learning-to-tattoo/


Needlestick injuries, are also a consideration.

The risks associated with home tattooing start with minor Staph infections and end with septicemia (which can be fatal) and transmission of serious, life-threatening viruses. Also, using your home as a tattoo studio puts you and your family at extreme risk of infections and diseases. Simply put, this is not safe, and is most likely against the law.

Learning on your own will not allow you the ability to use modern techniques and equipment, since most retailers will not sell professional-grade equipment to amateurs. Despite what you may have read on the internet, there are NO books that will teach you everything you need to know to be a tattoo artist. These will only give you bits of information, and without good, working equipment and true, complete information, you just can’t tattoo all that well.

If you’re planning on doing this for fun, don’t bother. It is an actual, honest-to-god, real-life career, and should be approached as one.

basic lettering for tattoos, script

lettering in script tattoo styleI do not know enough about lettering to call myself any kind of expert.

seriously. (check out some of my art with lettering in it for verification of that)

I am sometimes shaky, I am often confused by fonts, and although I have done thousands of tattoos with text in them, I still struggle with the forms and shapes. I owe the little I DO know about lettering to B.J. Betts, who is well-known in tattooing as a real expert on this stuff- he has some books out, if you are a professional tattoo artist you should keep your eyes peeled for them and buy them. (but if you work in a shop or have been around a while you already own all his stuff…)

I learned to do lettering before I ever heard of his work- the way I learned was through calligraphy, and through sign painting. A combination of those things and Betts’s work has formed my meager abilities.

Here’s a walk through on drawing this stuff. If you’re a tattooer you will naturally make the proper adjustments to the text as you go in order to make it applicable to skin, so I won’t be explaining the precise tech needed for that. If you just want to add a tattoo to a painting, a drawing, if you are not a tattoo artist you can use this how-to to make script lettering … or if you are doodling reference for your tattoo artist to build you a tattoo from, you can do this to give them an idea of what you’re after.

This is a step-by-step for script, cursive lettering in a slanted style in which the letters are connected.

I will post a separate one for block or stylized lettering next.

My tools:

Liquid acrylic ink,

fountain pen

(with round nib- just what I prefer)

colored pencil

(for beginning sketch/marking symmetry)

standard black #2 pencil

tracing paper, paper that is easy for ink lines

(I am using a scrap of srches hotpress here)

The rest of the steps, after the jump.

(more…)

on learning to tattoo.

owl tattoo brown tattoos on hipI get a lot of people asking me how to get started, wanting to show their art and find out if they should try to be tattoo artists.

They will ask about apprenticeships, teaching, equipment, schools, kits, “practicing at home”, “teaching themselves”, and all kinds of other stuff. I took the time a while ago to write up an article explaining how to get into tattooing the right way, how to learn without fucking people up, and how to find a decent place to learn from.

I hope this helps someone decide to go the right path to tattooing, and helps others decide it’s just not worth that much to them.

If you really are dedicated and persistent, if you really, really mean it, then you will eventually get there.

Unless you take shortcuts. Don’t take those. Do it the right way, even though it’s harder at the start.

I don’t review portfolios or teach anyone; but if you have more questions after reading this article, feel free to email me.


“The most difficult subjects can be explained to the most slow-witted man if he has not formed any idea of them already; but the simplest thing cannot be made clear to the most intelligent man if he is firmly persuaded that he knows already, without a shadow of doubt, what is laid before him.”
– Leo Tolstoy

(more…)

« Newer -- Older »

This is a unique website which will require a more modern browser to work!

Please upgrade today!